Configuring Raspberry Pi Network Interfaces
Updated: May 10, 2021
Raspberry Pi (RPi) has two network interfaces
- WiFi (wireless)
- Ethernet (wired)
When used inside the aircraft or other vehicle we’ll be connecting to the RPi via WiFi. RPi will be running as a WiFi access point (Hot Spot)
For working at home or lab we’ll be using primarily Ethernet connection.
Most of the functionality will be working equally good via either of the network interfaces, however, it is highly recommended to do all the configuration work via wired network (Ethernet).
Configure Static IP for your Ethernet
While you RPi is still connected to the keyboard and display, assign a static IP address to the unit’s Ethernet interface. [symple_box color=”yellow” fade_in=”false” float=”right” text_align=”left” width=”50%”]Please note that your home network might have different address space.
To find out your network space, check the address of your default gateway. In our case it is 192.168.0.1
If your default network gateway is for example 192.168.1.1, then the static IP address for the RPi board should be 192.168.1.111[/symple_box]
The IP address we use here is 192.168.0.111.
There are two ways: via graphic RPi desktop (GUI) or SSH terminal
GUI Option:
- Right click on the network icon at the top right corner of the desktop and click on Network Settings
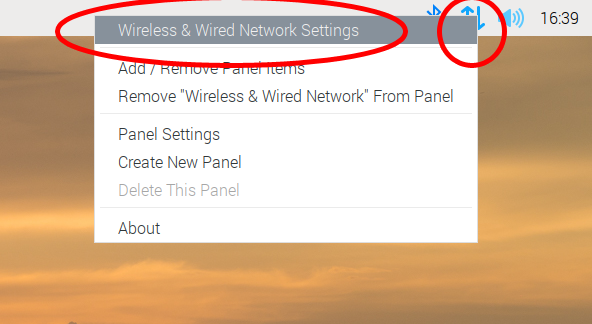
- Populate the fields as shown below (disable IPv6 if you cant reach the RPi by the static IP address):

- Click “Close”
- Restart the RPi
SSH option:
Open SSH terminal
- Edit the file /etc/dhcpcd.conf
sudo nano /etc/dhcpcd.conf
Scroll to the bottom of the file, and add the following lines (these lines might be already there commented out):
interface eth0
static ip_address=192.168.0.111/24
static routers=192.168.0.1
static domain_name_servers=192.168.0.1
Save the file with ctrl + o and then exit nano with ctrl + x.
A few people reported that IPv6 needs to be disable for the static address to work. to do that open the /etc/s y s c t l.conf file
sudo nano /etc/s y s c t l.conf
(Remove the spaces in the word “s y s c t l”. This is to bypass the “smart” antivirus of my internet hosting provider)
and add the following line at the end of the file
net.ipv6.conf.all.disable_ipv6=1
Save the file with ctrl + o and then exit nano with ctrl + x.
2. Restart your RPi
Enable SSH
At the end of the installation process make sure to enable SSH (https://www.raspberrypi.org/documentation/remote-access/ssh/).
While you are there enable SPI, I2C, and Serial Port.
Easiest way is to do it via GUI: Preferences -> Reaspeberry Pi Configuration
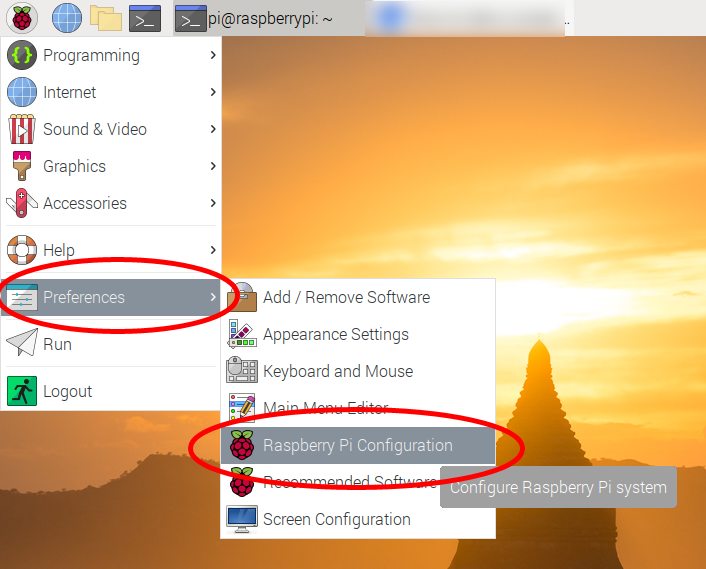
Select the services at shown below
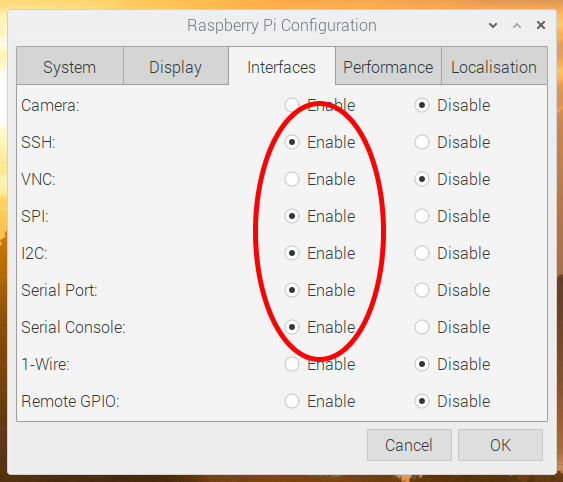
Restart your RPi
At this point you can disconnect your RPi board from the monitor and keyboard and connect to it via network using your favourite SSH client.
We recommend PuTTY https://www.putty.org/
Use the IP address configured above (192.168.0.111), login: pi, password: <whatever you put as password during installation>
From this point onward most of the configuration will be done via SSH (PuTTY)
Configure WiFi Access Point
Run apt-get update and upgrade to make sure you have the latest version of the operating system components. If you just installed your operating system, you can skip this step. It has been done for you already.
sudo apt-get update
sudo apt-get upgrade
Install the hostapd access point daemon and the dnsmasq dhcp service.
sudo apt-get install hostapd dnsmasq
Edit the file /etc/dhcpcd.conf
sudo nano /etc/dhcpcd.conf
Add the following lines
interface wlan0
static ip_address=192.168.4.1/24
nohook wpa_supplicant
Preserve the original dnsmas file and create a new one.
sudo mv /etc/dnsmasq.conf /etc/dnsmasq.conf.orig
sudo nano /etc/dnsmasq.conf
Put the following lines there
interface=wlan0
dhcp-range=192.168.4.2,192.168.4.20,255.255.255.0,24h
Configure the access point host software. Create a hostapd.conf file.
sudo nano /etc/hostapd/hostapd.conf
And put the following lines there
interface=wlan0
driver=nl80211
hw_mode=g
channel=7
wmm_enabled=0
macaddr_acl=0
auth_algs=1
ignore_broadcast_ssid=0
wpa=2
wpa_key_mgmt=WPA-PSK
wpa_pairwise=TKIP
rsn_pairwise=CCMP
ssid=EA
wpa_passphrase=123456789
Your wireless network name (SSID) will be EA and the password to access it will be 123456789
You can be a bit more creative with the network name and the password 🙂
The password should be at least 8 characters long.
This step (in red colour) is no longer required. DAEMON_CONF parameter has been deprecated and messes up Access Point configuration.
I’m keeping it here for pre-2019 versions of Raspbian
Show the system the location of the configuration file.
sudo nano /etc/default/hostapd
Find the line that says #DAEMON_CONF=”” – remove # and put the path to our config file in the quotes, like this:
DAEMON_CONF="/etc/hostapd/hostapd.conf"
Restart your Raspberry Pi
sudo reboot
Latest version of Raspbian (after 2019) have a strange issue with hostapd service. It fails to start with variety of error messages.
The following commands fix some of them.
Just to make sure run them anyway.
sudo rfkill unblock wifi
sudo systemctl unmask hostapd
sudo systemctl enable hostapd
sudo systemctl start hostapd
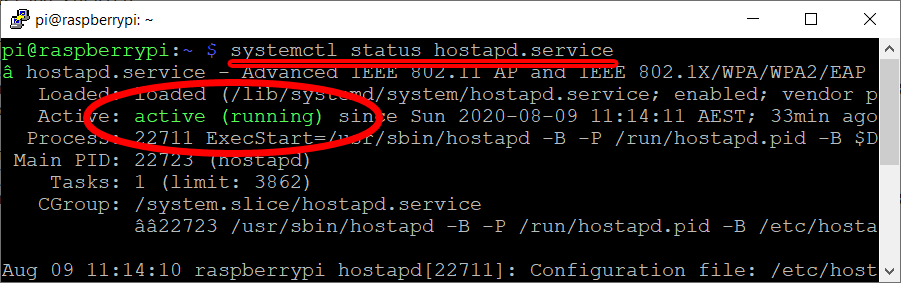
Confirm the Access Point is running
systemctl status hostapd.service
the output should look like this:
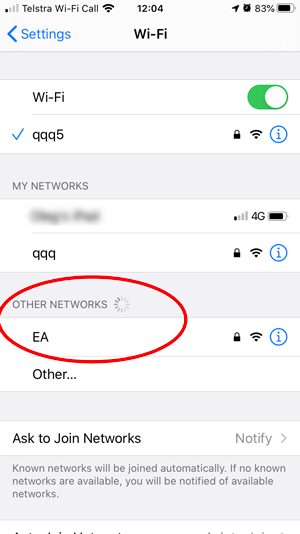
Use your mobile phone, tablet or a laptop to see is the EA WiFi network is visible